My boys LOVE being Cub Scouts. And hands down their FAVORITE Cub Scout activity is our annual Pinewood Derby event.
We have so much fun designing and making the cars with the boys every year. But, after the event is over, all their cars just end up in a bag in the closet. We are torn between wanting to leave them out so the boys can enjoy them and wanting to keep them hidden away so they don't get ruined and the boys can keep them throughout their lives. (Superman still has all of his old Pinewood Derby cars from when he was a kid.) So my solution: make a display rack.
(Click on any of the pictures to see them larger.)
What you'll need: (Note, the pictures show supplies for two display racks.)
|
|
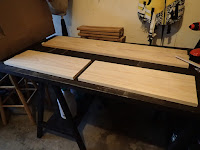
| Step 1: Cut the 1 in. x 10 in. x 4 ft. into half, forming two 1 in. x 10 in. x 24 in. boards. You'll use one of these boards as the backboard for the display rack. Sand until smooth. | |
| Step 2: Cut the 1 in. x 4 in. x 4 ft. board into the five shelves. I used the backboard itself to measure the appropriate width for each shelf. Sand until smooth. (I measured, cut, measured, cut, etc. because I was afraid if I did all the measurements before cutting that the tiny bit lost from each side of the cut would affect the overall width of each cut.) |
|
| Step 3: Create a *template* for even measurements on each shelf by covering the back edge of your shelf with the painter's tape and measuring 1.5 in from each edge. Then drilling a small screw hole in the middle at each end. Repeat this using the template on each shelf. | |
| Note: To make sure I didn't drill too deeply, I marked the drill bit with a piece of painter's tape to show me where to stop drilling. | |
| Step 4: Using the painter's tape template, measure and mark the drill holes on the backboard. I started with the template at the very bottom of the board, drilling holes all the way through where the two existing holes were. Then moving the template 4 inches up and drilling those holes. Repeat until you have holes drilled for five shelves 4 inches apart. | |
| Step 5: Drill all of the screws through the backboard until they were just barely peaking through. | |
| Step 6: Put a line of wood glue on the inside of the shelf. | |
| Step 7: Align the holes on the shelf with the screws in the backboard and then screw each shelf on tight. Wipe off any wood glue that squeezes out. | |
| The display rack could probably be used once the shelves are added, but because we are dealing with cars on wheels, we have to do something to make sure they don't roll off. My solution was to add a tiny raised platform in the center of the shelf for the car to rest on, with its wheels resting just off the shelf. | |
| Step 8: Take the 1/2 in. 2 in. x 3 ft. and cut it into five 6 inch strips. Sand until smooth. | |
| Step 9: First measure and mark the center for each shelf. Then put some glue on the bottom of each strip and place on the pre-marked area. | |
| Step 10: Clamped the strips and let them dry for about 5 minutes. | |
| Step 11: Measure the center of the back, about 1-2 inches down from the top and add the sawtooth hanger. | |
| Step 12: Finish as desired. I painted each shelf the color of the different dens and finished the backboard with a clear stain. Finally, I finished it all off with 3 coats of high gloss polyurethane to prevent the paint from chipping. | |
Overall, it took about $25 and 5 hours (including all the painting) to finish both display racks. I hope you enjoyed the tutorial and will have fun making an easy Pinewood Derby display rack for your own Cub Scout!


