Showing posts with label diy. Show all posts

Thursday, April 14, 2016

DIY Cub Scout Pinewood Derby Display Rack

My boys LOVE being Cub Scouts. And hands down their FAVORITE Cub Scout activity is our annual Pinewood Derby event.

We have so much fun designing and making the cars with the boys every year. But, after the event is over, all their cars just end up in a bag in the closet. We are torn between wanting to leave them out so the boys can enjoy them and wanting to keep them hidden away so they don't get ruined and the boys can keep them throughout their lives. (Superman still has all of his old Pinewood Derby cars from when he was a kid.) So my solution: make a display rack.

(Click on any of the pictures to see them larger.)

This blog post gives you a step-by-step explanation of how I turned this:

Into this:

What you'll need: (Note, the pictures show supplies for two display racks.)
  • 1 in. x 10 in. x 4 ft. board (I used pine)
  • 1 in. x 4 in. x 4 ft. board
  • 1/2 in. 2 in. x 3 ft.
  • 10 #6 x 1 1/2 in. wood screws
  • wood glue
  • electric drill with bits
  • electric saw (we used a circular saw)
  • pencil and ruler
  • paint tape, paint, and stain
  • sawtooth picture hanger
Step 1: Cut the 1 in. x 10 in. x 4 ft. into half, forming two 1 in. x 10 in. x 24 in. boards. You'll use one of these boards as the backboard for the display rack. Sand until smooth.
Step 2: Cut the 1 in. x 4 in. x 4 ft. board into the five shelves. I used the backboard itself to measure the appropriate width for each shelf. Sand until smooth.

(I measured, cut, measured, cut, etc. because I was afraid if I did all the measurements before cutting that the tiny bit lost from each side of the cut would affect the overall width of each cut.)
Step 3: Create a *template* for even measurements on each shelf by covering the back edge of your shelf with the painter's tape and measuring 1.5 in from each edge. Then drilling a small screw hole in the middle at each end. Repeat this using the template on each shelf.
Note: To make sure I didn't drill too deeply, I marked the drill bit with a piece of painter's tape to show me where to stop drilling.
Step 4: Using the painter's tape template, measure and mark the drill holes on the backboard. I started with the template at the very bottom of the board, drilling holes all the way through where the two existing holes were. Then moving the template 4 inches up and drilling those holes. Repeat until you have holes drilled for five shelves 4 inches apart.
Step 5: Drill all of the screws through the backboard until they were just barely peaking through.
Step 6: Put a line of wood glue on the inside of the shelf.
Step 7: Align the holes on the shelf with the screws in the backboard and then screw each shelf on tight. Wipe off any wood glue that squeezes out.
The display rack could probably be used once the shelves are added, but because we are dealing with cars on wheels, we have to do something to make sure they don't roll off. My solution was to add a tiny raised platform in the center of the shelf for the car to rest on, with its wheels resting just off the shelf.
Step 8: Take the 1/2 in. 2 in. x 3 ft. and cut it into five 6 inch strips. Sand until smooth.
Step 9: First measure and mark the center for each shelf. Then put some glue on the bottom of each strip and place on the pre-marked area.
Step 10: Clamped the strips and let them dry for about 5 minutes.
Step 11: Measure the center of the back, about 1-2 inches down from the top and add the sawtooth hanger.
Step 12: Finish as desired. I painted each shelf the color of the different dens and finished the backboard with a clear stain. Finally, I finished it all off with 3 coats of high gloss polyurethane to prevent the paint from chipping.

Close up of Thing 1's

Close up of Thing 2's

Overall, it took about $25 and 5 hours (including all the painting) to finish both display racks. I hope you enjoyed the tutorial and will have fun making an easy Pinewood Derby display rack for your own Cub Scout!

Tuesday, January 31, 2012

Bunting

I have a confession:  I don't get bunting.  (aka banners or penants)

Imagine my Jerry Seinfeld impression: "What is the deal with bunting?"

Bunting, bunting, bunting.  It's EVERYWHERE!  It has invaded Pinterest.  There is bunting spackled all over my favorite crafting blogs.

Especially burlap bunting.  God, people LOVE their burlap bunting.

www.oopseydaisyblog.com
Sometimes literally.

But I just don't get them.

I mean, sure.... they are cute, or pretty, whatever.  But they just hang there.  And they are almost always temporary decoration.

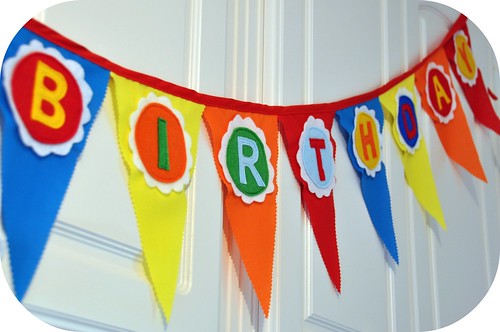
People make birthday bunting.
rosinahuber.blogspot.com
Christmas bunting.
chalk-jenny.blogspot.com/
Halloween bunting.
blog.craftzine.com
Thanksgiving bunting.
blogs.babble.com/
Easter bunting.
favecrafts.com
New baby bunting.
www.thesweetestoccasion.com
Just-for-the-helluv-it bunting.
lavieinspirations.com
If there is a life event, like say today being a Tuesday, bunting enthusiasts can find a reason to whip up a strip of bunting.  (Although, I did search "bowel movement bunting" on google images and came up with bupkis.  So, apparently there are some limits.  That haven't been reached, yet.)

And just where do they put all of this freaking bunting?  You can't convince me everyone in the world but me has a mantle to hang them on!
www.oopseydaisyblog.com

And then what do they do with it after.  You know, after the holiday is over...  I KNOW they don't keep the bunting to reuse it next year.  Because next year they are going to make NEW BUNTING.

In my mind these people have a room in their house just for displaying their old bunting.


Don't get me wrong, I don't hate bunting.  All of these pics I linked to are pics of awesomely done bunting.  But it's like this: I like to quilt, but my house only needs so many quilts.  So instead of making a new quilt after new quilt just because it's pretty and I like to do it, I don't.  And I just work on other, different, projects until the need to make a quilt (birthday, new baby, etc) arrises again.

I guess the difference is that bunting is small, so stores easier (but like I mentioned above, I highly doubt these bunting addicts are rehanging year after year), and also it is very decorational, but still....I can just not wrap my mind around the craft world's new obsession with this cute, but seeming useless craft.

Sunday, October 9, 2011

Ketchup catch-up

Thing 2's ketchup costume is finished!

One I finished making the labels (materials: felt, hot glue gun, and puffy paint), I just had to make the actual bottle shape.


I didn't have a pattern, so I literally laid my little ketchup kid down on the felt and did a police outline of his body.


Unfortunately, my ketchup kid (Thing 2) wasn't being very cooperative after the initial measurements, so luckily I had a clone happy to step in for the "fittings".


Finished product.

I plan on having Thing 2 wear a red shirt under the costume.  I'll have to have a long sleeve one on stand-by in case it gets cold.  No jacket is going on over this costume!


And, I've already finished the labels for Thing 1's mustard costume.


Seriously, I love Halloween!  When Steve Jobs tells the world to follow your passions, I think to myself "Self, why can't you find a job where you get paid to make Halloween costumes all year long?" :)

Wednesday, October 5, 2011

Halloween is coming!

Halloween is just 26 days away! Which, seems like a lot of time, but if you saw our family's calendar for this month, you'd understand why I already feel like I'm running behind making Thing 1 and Thing 2's Halloween costumes.


As I've discussed before, I come from the school of make-your-own-costumes. And as a mother of twins, I like to dress my boys in coordinating themes. So this year, we decided to do Ketchup and Mustard. Superman actually came up with the original idea, after seeing ketchup and mustard costumes at Menards. It seemed like a perfect fit for them because we are going through a phase right now where they want "sauce" on everything. And wouldn't you know it, Thing 1 only wants mustard. Lots and lots of mustard: on hotdogs, on french fries, on chicken nuggets, on Ritz crackers. You name it. Thing 2, the same thing except he wants ketchup on everything. I even saw him dipping his apples and grapes in ketchup. And he ate them!!

Of course my boys can't wear any regular old generic ketchup and mustard costume :), so I hit the internet and searched for inspiration.  Basically, I decided to model their costumes after the old fashioned Heinz ketchup bottle and French's mustard bottle.

Last night I measured the boys and then drafted a costume based on their proportions. Then, using felt, I designed the Heinz ketchup label. I used my spring loaded snippers to cut out the intricate letters out of adhesive backed black felt.  I started cutting out the red lettering too, but it came out too fat, so I settled on using red fabric paint instead.

I replaced the original "Est" date with 2007, since that is the year Thing 1 and Thing 2 were born.  And I changed the "Net Wt" to their weight in ounces.  For the label under the cap (not shown) I used 04 instead of 57, since the boys are 4 years old.

Now, I just need to figure out how I'm going to create the bottle itself. I can't decide if I should do all one piece with a face hole cut out or break it into two parts, with the neck as a hat.

Oh, and remember the Thomas the Tank engine we made from a wagon last year? We liked having the wagon so much for practical and logistical purposes that this year we are repurposing it as a hot dog stand.

Now if only we had a dog to stick in a hot dog costume.

Saturday, July 30, 2011

40 B4 40: Build Something

For the past year, I've been wanting a craft table, but nothing I ever found was just perfect (read: big enough). Then, about a month ago, I ran across a blog that had plans for a simple saw horse table, and I knew I'd found not only my table, but an opportunity to check #37 Build Something off my 40 Things I Want to Do Before I Turn 40 list.

First, I built the saw horse "legs" for the table.  And stained them black.

Thing 1 helping Superman cut my boards

Wood filler done and sanded

Saw horses done
Then, I found an old door and stained it black.
The saw horses really work!
Then....  TA-DA!
I can't wait to have this covered with a craft project!


This is literally a huge improvement over my old craft table!
Too tiny!


I can't wait to build something else!